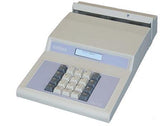
 These simple instructions will guide you through the process of printing temporary checks for your bank or financial institution. Before you begin, make sure the M360 or M366 check encoder has been reset to factory default settings. This is important especially if you're using a refurbished/used encoder to make sure the previous owner's data has been erased. For help, check out our blog post Reset and clear your Maverick M360/M366 MICR III Check Encoder.
Printing Temporary Checks (How-to Steps)
- Turn on your Maverick M360/M366
- Press the 'F2' key
- Type in the checking/account number
- Press the '#' key. This is especially important if you have to edit the amount and/or check number.
- Press the 'F3' key (only if you wish to edit/add an amount)
- Type in the amount, if you do not wish to enter an amount hit the '#' key to go back
- Press the '#' key
- Press the 'F4' key
- Type in the check number
- Press the '#' key
- Insert your check and you're done!
F key index
- F2 = checking/account number
- F3 = amount/value
- F4 = check number